Stucco Crack Repair on Vancouver Low-Rise Buildings Before the Wet Season
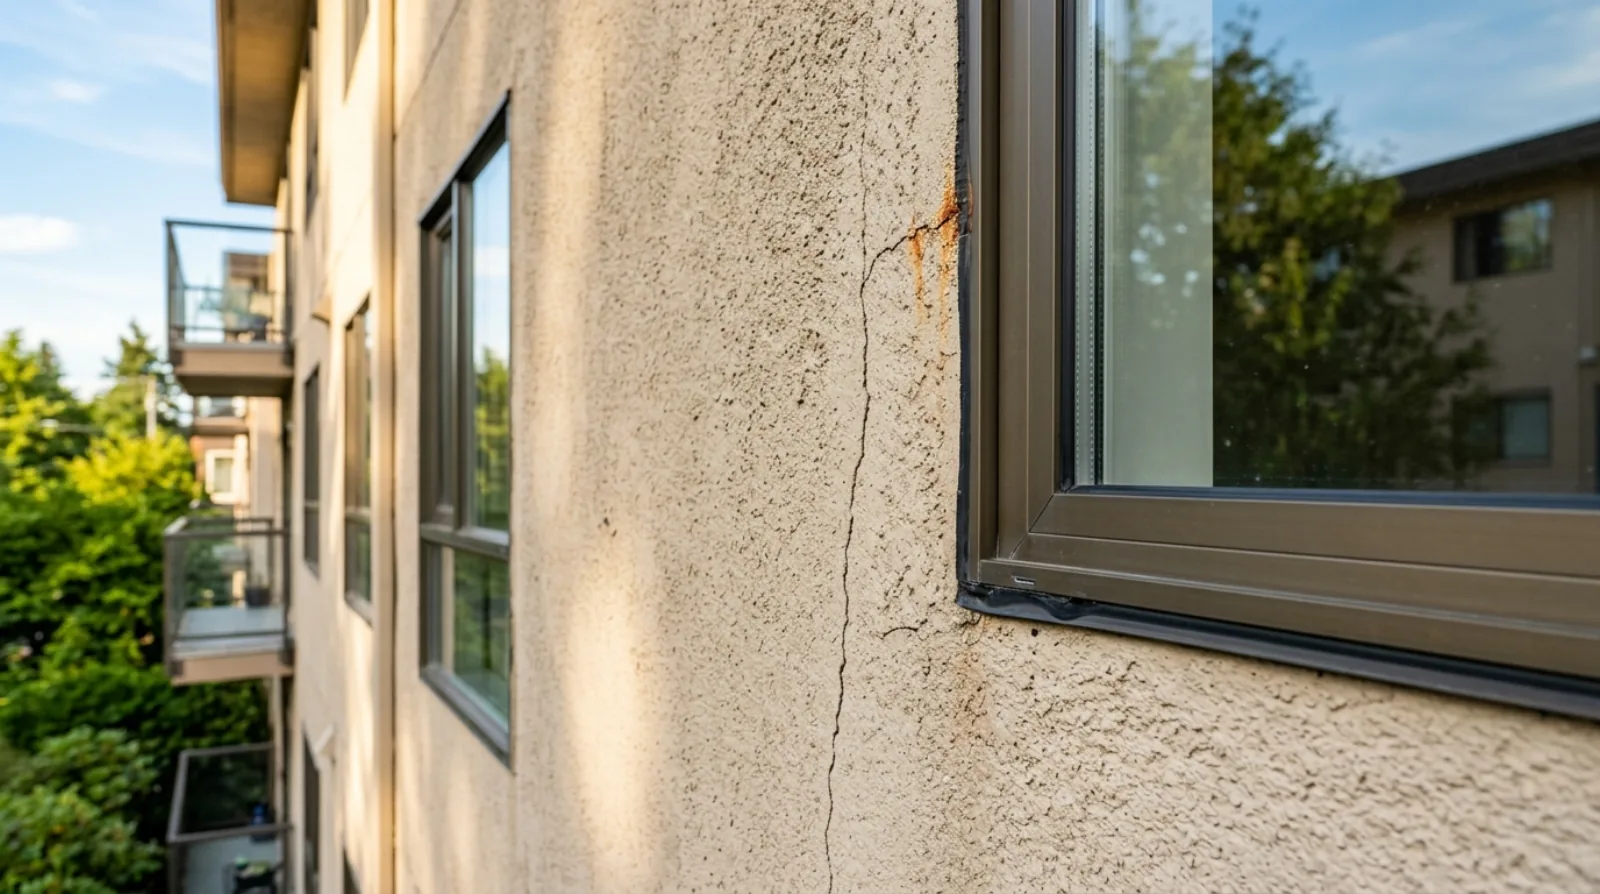
Vancouver’s wet season starts in earnest in mid-October. By then, the working window for outdoor stucco repair is essentially closed — substrates won’t stay dry long enough for sealants and patches to cure, and overnight temperatures begin to dip below the manufacturer minimums for elastomeric crack fillers. That leaves August and September as the practical repair window for low-rise stucco buildings across the Lower Mainland.
This article covers what to look for during a late-summer stucco walk-around, which cracks matter, which can wait, and what the repair sequence actually looks like.
Why Vancouver stucco cracks in the first place
Stucco is a brittle cement-based finish bonded to a flexible building substrate. When the wall behind it moves — and every Lower Mainland building moves, daily, with temperature swings and seasonal moisture — the stucco has to absorb that movement at predictable joints. Most older Lower Mainland buildings either don’t have those joints or have them in the wrong places.
The result is random cracking that follows the path of least resistance: down from window corners, across the field of large uninterrupted walls, and around penetrations. Add the West Coast freeze-thaw cycle (rain enters a crack, freezes overnight, expands the crack a fraction), and a hairline opening in October becomes a finger-width gap by March.
There are three failure patterns to recognize:
- Movement cracks — straight runs from window corners or at panel edges. These follow building expansion and contraction. Usually narrow but persistent.
- Settlement cracks — diagonal cracks near building corners or above lintels. These tell you about historic substrate movement and may continue to widen.
- Map cracking — fine spider-web cracking across the field. Usually shrinkage from the original installation. Cosmetic individually, but a sign the surface is ready for a permeable coating to prevent water absorption.
What to inspect before October
Walk the building perimeter on a dry afternoon. Bring binoculars for elevations above the first floor. Note locations on a simple sketch — photos alone get hard to organize on a multi-storey wall.
The high-priority cracks
- Anything wider than a credit card on a west, south, or southwest elevation
- Vertical cracks at window corners, especially upper corners where wind-driven rain pools and runs
- Horizontal cracks along sill lines under windows — water lingers here, then enters the wall
- Cracks with rust staining — the rust tells you a metal fastener, lath staple, or accessory is corroding inside the assembly
- Cracks that telegraph a soft sheathing feel when you press firmly nearby — investigate before sealing
The watch-list cracks
- Hairline vertical cracks under 0.5mm wide on protected elevations (typically east and north)
- Map cracking with no rust staining and no associated soft spots
- Cracks at re-entrant corners that have already been repaired and are recurring (these often need a different joint detail, not another crack fill)
The do-not-just-seal patterns
- Widespread efflorescence (white mineral deposits) on the wall face
- Paint blistering or peeling in sheets
- Visible rust running from multiple unrelated locations
- Any wall that sounds hollow when you tap it
These patterns mean water is already inside the wall. Sealing the cracks at this stage traps moisture and accelerates damage. A moisture investigation is the right next step, not crack repair.
The repair sequence — how it’s actually done
A proper stucco crack repair on a Lower Mainland building has five steps. Cutting any of them is how repairs fail within two seasons.
- Open and clean the crack. A grinder or oscillating tool widens the crack to a consistent profile (typically 6–10mm wide and 6–10mm deep on cracks that need backer rod). All loose debris is removed. The substrate is allowed to dry.
- Install backer rod where needed. Closed-cell foam backer rod fills the depth of the crack so the sealant forms an hourglass profile that flexes correctly — instead of a deep bead that splits in tension. On hairline cracks this step is skipped in favour of a thin elastomeric filler.
- Apply elastomeric sealant. Polyurethane or specialty stucco-compatible sealant is tooled into the crack, fully wetting both sides. The sealant must be paintable, UV-stable, and rated for the joint movement expected.
- Texture-patch the surface. This is the craft step. A thin coat of texture-compatible patching material is feathered over the repair, then worked with the appropriate tool — sponge float for sand finish, brush flick for dash, trowel knockdown for knockdown finishes — to match the surrounding texture. A wrong texture stays visible from the street forever.
- Coat with an appropriate finish. Elastomeric wall coatings bridge fine surface cracks and add a water-resistant, breathable layer over the repair. For maximum durability and uniform appearance, the entire wall (not just the patched area) is recoated when a significant percentage of repairs is concentrated on one elevation.
What goes wrong when buildings skip pre-storm repair
The pattern we see every winter in our emergency call book is the same:
- Late November atmospheric river drops 80–120mm of rain in 36 hours
- Water enters known but un-sealed wall cracks
- Sheathing behind the stucco gets saturated
- Insulation wicks moisture sideways
- Three weeks later, an upper-floor unit notices wall staining near a window
- By the time it’s reported and investigated, water has already migrated into framing
The repair scope at that point is no longer a stucco crack repair — it’s a wall opening, sheathing replacement, insulation drying, interior repair, and stucco rebuild. The work waits for the spring weather window. The unit owner deals with months of disruption. The strata files an insurance claim and pays a deductible that often exceeds what the original crack repair would have cost.
This is why our wet-season recommendation to strata councils and commercial property managers is the same every year: walk the building in August, scope the repairs in September, and have the work done by mid-October.
Coordinating crack repair with other late-summer work
Stucco crack repair is rarely the only item on a fall pre-storm scope. Most low-rise buildings benefit from bundling it with:
- Window perimeter sealant inspection — same elevations, same access, same wet-season risk
- Exterior coating condition assessment — if it’s been 10+ years since the last full recoat, the crack repair scope may justify a full re-coating job rather than spot work
- Roof drainage check — clogged scuppers and overflow drains push water back onto the wall face and accelerate crack damage
Bundling these into a single contractor visit reduces mobilization cost and ensures the work is sequenced correctly (cracks are sealed before any topcoat goes on).
For high-elevation cracking on a low-rise building (three storeys and up), rope access is usually faster and cheaper than swing-stage rigging, and lets the technician do close-up inspection while completing repairs. See rope access vs. swing stage for how the access choice affects pricing.
When stucco crack work crosses into a larger repair
If during the walk-around you find:
- More than a handful of cracks per elevation with rust staining
- Any wall that sounds hollow over significant area
- Soft spots in the stucco surface
- Active leaks tracking back from interior staining
…then crack repair on its own won’t solve the problem. The right next step is a building envelope condition assessment — a structured review by a qualified envelope consultant or engineer that identifies the failure mechanism and scopes appropriate repairs. See what a building envelope condition assessment covers for what to expect.
For depreciation-report purposes, documenting the crack repair work — dates, locations, materials, photos — feeds into the building’s maintenance history and supports the assessor’s condition rating for the exterior wall component. See the 2026 depreciation report deadline for how envelope maintenance affects depreciation report outcomes.
Related guides
- Exterior Coatings Hub — coating types, lifespan, and re-coat timing
- Signs Your Building Needs Sealant Replacement — visual indicators of sealant failure
- Building Envelope Condition Assessment — when crack repair alone isn’t enough
- Fall Maintenance Checklist for Strata — full pre-storm walk-around guide